Last updated:
May 2026
Make Your Own LLM Personal Assistant with DeepSeek R1
DeepSeek R1 rivals OpenAI’s O1 in reasoning tasks at a lower cost. This post explores its architecture, running it on a WhiteFiber 8xH200 Cloud GPU, and building a Gradio GUI for interaction.
AI

DeepSeek R1 has had a significant impact on the AI industry since its release earlier this month, and for good reason. The implications of training a LLM at the same capability level as OpenAI’s O1 is remarkable and even more so when considering the reported cost of doing so. The model shows incredible promise across a variety of reasoning tasks such as math, coding, and logic problems with a unique response style that feels uniquely human. The model was released with a MIT license & a publicly accessible API and website GUI, making it possible for anyone to use or recreate their research, assuming they can support the hardware requirements.
In this blog post, we will:
- Discuss what makes R1 just so innovative, exploring its architecture and training strategy in depth.
- Walk through how to run a DeepSeek R1 server using SGLang on a WhiteFiber 8xH200 Cloud GPU Server.
- Create a Gradio application GUI through which we can use natural language to interact with the server.
DeepSeek R1: Innovation at Low Cost
The breakthrough innovation of R1 lies predominantly in its training strategy. The researchers at DeepSeek hypothesized that letting the model speak longer, lengthening the Chain of Thought (CoT), allowed for deeper introspection during reinforcement learning. Not only did they find this to be correct, but their paradigm allowed them to train their state-of-the-art model for just a fraction of the cost as compared to competitive models such as O1.
Let’s look more closely at the R1 model to learn what makes it so powerful.
DeepSeek R1 training strategy
To train DeepSeek R1, the team used reinforcement learning (RL) for the base model, QWEN 2.5, without relying on any supervised fine-tuning (SFT). This approach allowed the model to explore deep CoT reasoning for solving complex problems, resulting in the development of DeepSeek-R1-Zero.
DeepSeek-R1-Zero is the baseline model from which DeepSeek-R1 was created through supervised tuning and further reinforcement learning stages. DeepSeek-R1-Zero already demonstrates capabilities such as self-verification, reflection, and generating long CoTs due to the novel RL training methodology. Notably, it is the first open research to validate that reasoning capabilities of LLMs can be incentivized purely through RL, without the need for SFT.
R1 was created by RL training the model further on a checkpoint fine-tuned on hundreds of thousands of long CoT examples, with additional SFT on examples generated by the model itself. The initial SFT stage improved human readability and advanced the potential of the model, surpassing DeepSeek-R1-Zero on various tasks. Subsequent RL then further enhanced the model’s reasoning capabilities. A final SFT round improved capabilities within other domains beyond reasoning such as writing, role-playing, and other general purpose tasks.
After creating DeepSeek-R1, the team worked to extend the advanced reasoning capabilities to other models through distillation. 80,000 examples generated by DeepSeek R1 were used to fine-tune various models of different parameter counts, including Llama-3.3-70B-Instruct, Qwen2.5-Math-1.5B, and Qwen2.5-32B. This SFT allows for the transfer of the deep reasoning capabilities to these models, which the DeepSeek researchers have made available.
How to deploy DeepSeek R1
In this guide, we will demonstrate step-by-step how to set up a DeepSeek R1 SGLang server and a Gradio GUI that we can use to interact with the model.
1. Connect to your machine:
To run DeepSeek R1 requires a multiple GPU set-up with a minimum of profile of 16 x NVIDIA A100 80GB. A single H200x8 multi-GPU machine is required to run this tutorial.
Once your machine has been created and you have been given access, we can begin connecting to the server from your local machine. To connect to the server, we must first access our GPU through SSH. SSH into your machine:
```bash
Python app.py
```
2. Mount driver
Before we continue, we need to make sure we are operating in a sufficient environment to run R1. The original model, with 671 billion parameters, is 720GB. In order to access the storage containing the models we need to mount them on our system drive. Use the following commands to mount your volume to the directory /mnt/
```bash
Vgdisplay
## find the Volume Group name
sudo lvcreate --name volumeTest --size 5T <your VG name>
mkfs -t ext4 /dev/nexus/volumeTest
mount /dev/nexus/volumeTestV1 volumetest/
Cd /mnt/volumetest/
```
This will make sure we have sufficient storage space to download R1’s full model weights.
3. Download the model R1 full weights
To download the full model weights for R1, we can either use git-lfs or change the directory of the HuggingFace cache and use the HuggingFace CLI. Use either of the examples below to get your download started. The HuggingFace CLI was much faster in our experiments.
```bash
## git-lfs methodology
Apt install git-lfs -y
Git-lfs clone https://huggingface.co/deepseek-ai/DeepSeek-R1

## HuggingFace CLI methodology
Pip install huggingface-cli
Mkdir mnt/volumetest/cache/
Export HF_HOME=/mnt/volumetest/cache/
Huggingface-cli download deepseek-ai/DeepSeek-R1
```
Once your download completes, we now need to set up our server package SGLang.
4. Install SGLang and requirements
Installing SGLang onto our machine, fortunately, is very simple. Just paste the following command into the terminal:
```bash
pip install "sglang[all]>=0.4.2.post4" --find-links https://flashinfer.ai/whl/cu124/torch2.5/flashinfer
```
This will install SGLang along with all the required packages to run the server. Finally, we are ready to run the server with R1.
5. Deploy DeepSeek R1 on an SGLang server
To launch the SGLang server, we must first identify the path to our model files. Find the path in the volumetest directory, and paste it with the following command into the terminal where prompted:
```bash
python3 -m sglang.launch_server --model <path to deepseek R1> --tp 8 --trust-remote-code
```
This will launch our SGLang server with R1. This process may take a few minutes to load up, so in the meantime, we can launch the Gradio GUI application.
6. In new terminal window, launch Gradio application
Create a new terminal window, and SSH into it using the same steps you used before. Navigate to a working directory of your choice. Here, create a new file called app.py. Paste the following Python code into the application file.
```Python
import time
import gradio as gr
import openai

def get_message(message, history, tokens, temperature):
    print(tokens)
    client = openai.Client(base_url="http://127.0.0.1:30000/v1", api_key="None")
    # Use stream=True for streaming responses
    response = client.chat.completions.create(
        model="DeepSeek/DeepSeek-R1",
        messages=[
            {"role": "user", "content": message},
        ],
        temperature=temperature,
        max_tokens=tokens,
        stream=True,
    )
    out = ""
    # Handle the streaming output
    for chunk in response:
        if chunk.choices[0].delta.content:
            out += chunk.choices[0].delta.content
            yield out
with gr.Blocks() as demo:
    tokens = gr.Slider(minimum = 64, maximum = 8000, value= 512, step = 16, interactive=True, label = '# of Tokens')
    temperature = gr.Slider(minimum = 0, maximum = 1, value= 0, step = .1, interactive=True, label = 'Temperature')
    gr.ChatInterface(
        fn=get_message,
        additional_inputs = [tokens, temperature],
        type="messages",
        save_history=True,)
demo.launch(share = True)
```
With this step done, if our server has finished loading, we have completed every step to serve R1 on our machine and can now start chatting! All that remains is to launch the application in our new terminal window.
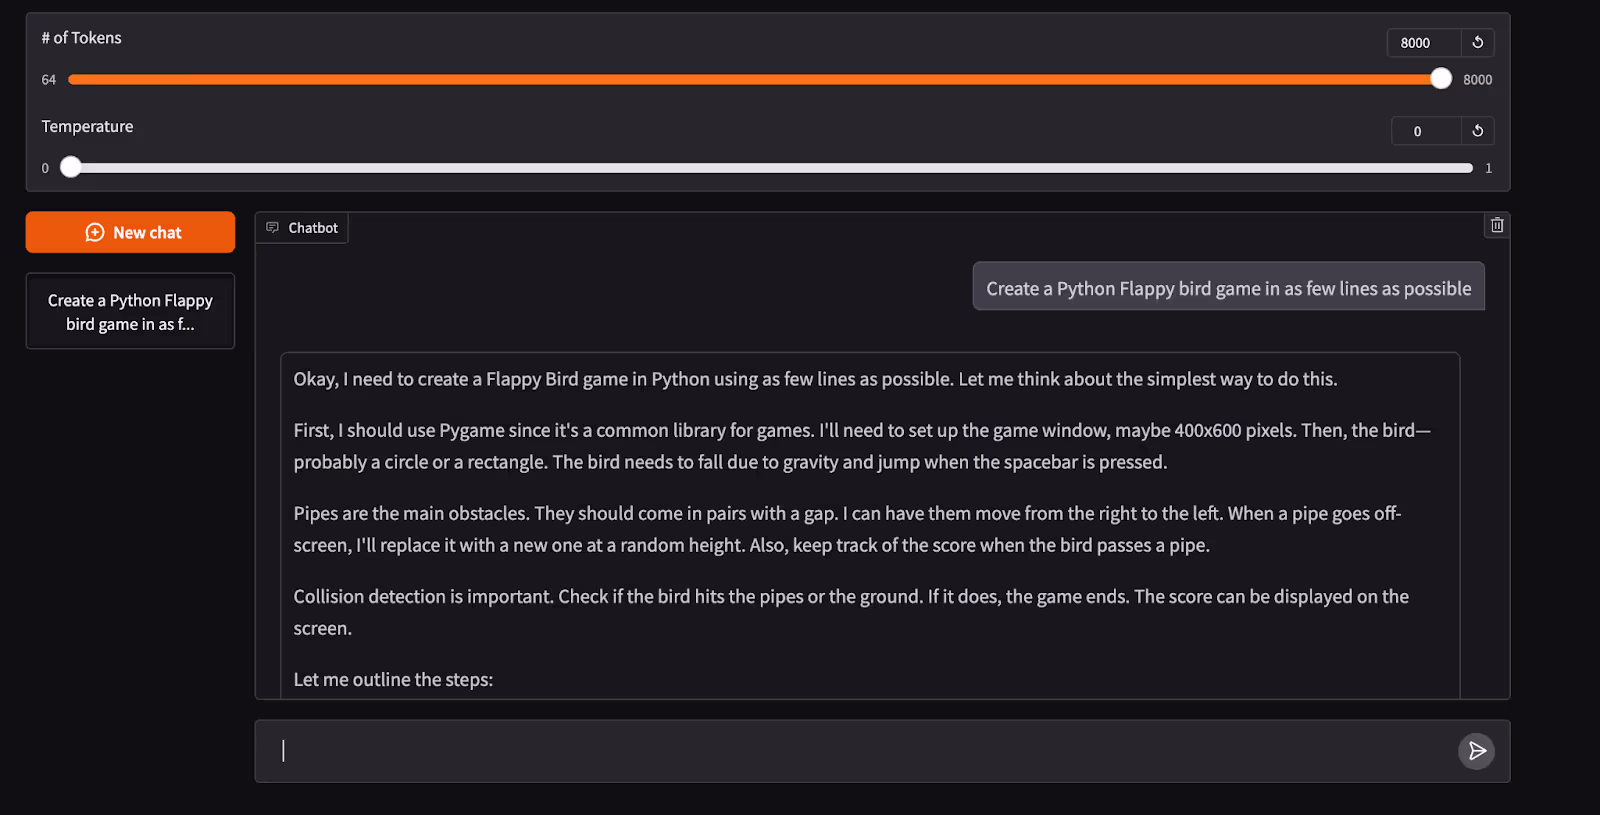
7. Run application and get chatting!
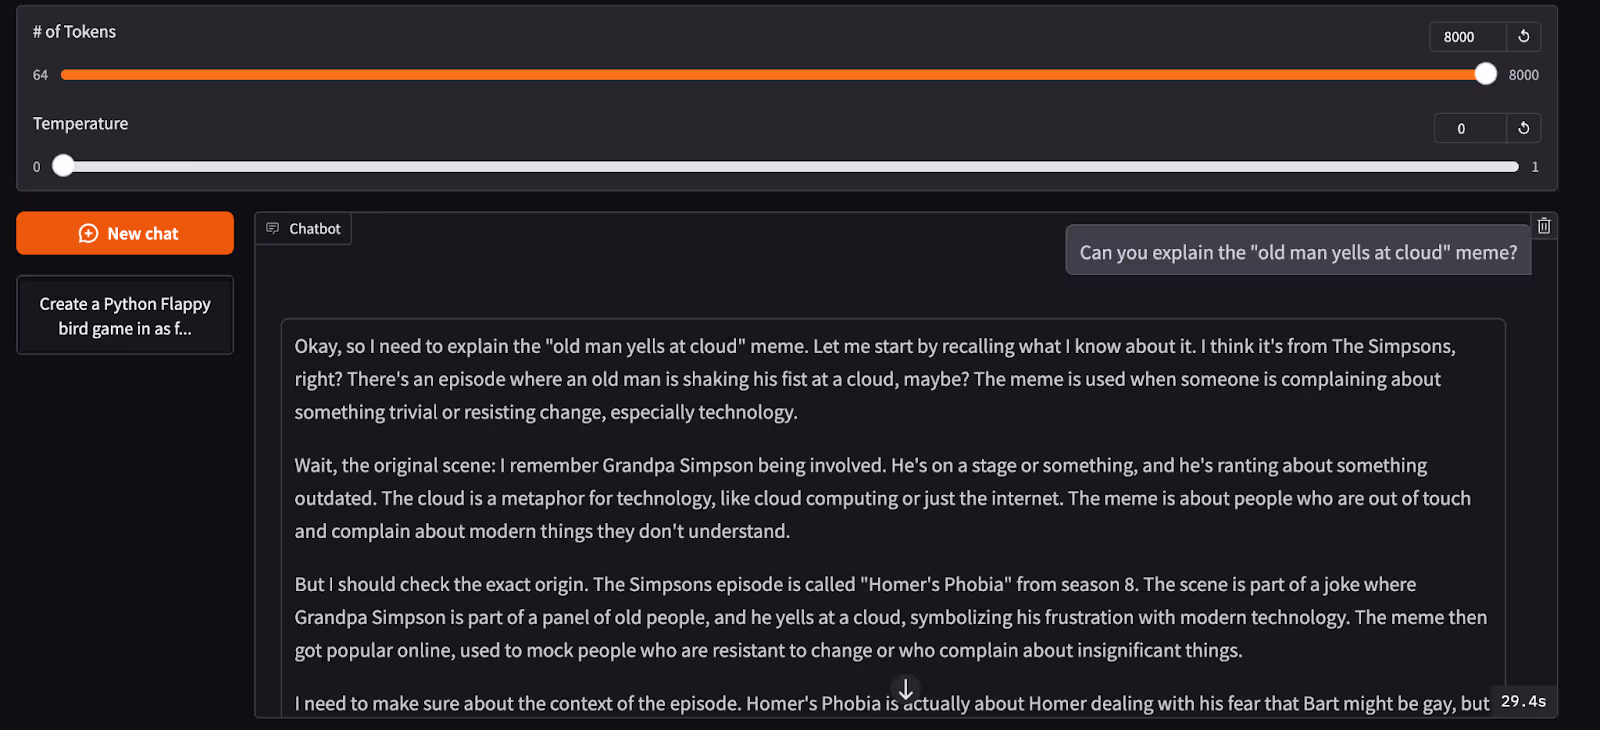
```bash
Python app.py
```
Now, we get to the GUI. This is a simple chatting application made in Gradio designed to give baseline interactivity to the user with the deployed model. Users can enter in their prompt with control over the temperature and number of tokens generated, and get back the responses in ordered, human readable formatting. We suggest playing around with the model this way, as it makes it much easier to read the outputs.
Conclusion
DeepSeek R1 is an incredibly powerful model. The innovations it has made for reasoning at low cost with reduced hardware requirements cannot be understated. We are excited to keep watching DeepSeek develop and grow more projects, like Janus Pro, and to see how the R1 series of models evolves going forward.

.png)